Files and FTP
This is an in-class exercise. On your USB drive or laptop, you'll create the folders you'll be saving your files into this entire class. You will learn how to use Dreamweaver to upload those files.
Part 1 -- Preparation
You must have a USB drive or a laptop computer.
Part 2 -- File Management
- Create a folder for all of your work in this class called cas111d
- Create the following folder structure on your USB drive inside the cas111d folder -- these are all folders and note that some are sub-folders of others as shown by the indention (i.e, cal1, cal2, cal3, and cal4 are sub-folders of the calisthenics folder):
Instructor Note:
Always, always, always use lower case for folder names and filenames you use on the Web or that you use in conjunction with your website work. This is an industry standard, best practice.
DO NOT use spaces in folders and file names.
DO NOT use periods that do not immediately precede a file extension.
DO NOT use any character that is not a letter, number, dash, or underscore.
- calisthenics
- cal1
- cal2
- cal3
- cal4
- examples
- finalsite
- oregonff
- spiffy
- textbook
Files on your USB drive or laptop will be referred to as your local files.
Instructor Note:
Files you work with on your own drive are your local files. Files that have been uploaded to a Web server are remote files.
Part 3 -- Course Files
Download the coursefiles.zip file to a temporary location (the desktop is a good choice). Open it up and drag and drop folders from it to the folders you just created on your USB drive/laptop as described below.
- The cal4-site folder contains 5 Web pages (.html files) and a folder (assets) that should go directly into your cal4 folder.
- All the chapter folders go under your textbook folder.
- The fonts folder goes under your textbook folder.
- The oregonff folder contains 4 files (blank.png and 3 the-oregon-film-festival-story documents) and a folder (assets) that go directly under your oregonff folder.
- The spiffy-assets folder contains the images and other files that go in the assets sub-folder under your spiffy folder.
- When you finish copying these files and folders, you should have the following new local folder structure:
- calisthenics
- cal1
- cal2
- cal3
- cal4
- assets
- examples
- finalsite
- oregonff
- assets
- spiffy
- assets
- textbook
- chapter01
- chapter03
- chapter04
- chapter05
- chapter06
- chapter09
- chapter12
- fonts
Part 4 -- Site Definition and FTP
- Create a site definition for use with this class as described in class and in Lecture Notes -- Site Definition. You will use your cas111d as the local folder and your user folder on the SWS as the remote folder.
- Upload your spiffy and textbook folders only to the SWS.
- Check the SWS with a browser to ensure your folders are there and in the right location.
- Export the .ste file and save it into your cas111d folder.
- Make the .ste file so that it can't be uploaded -- this file is a backup, not a Web page or something else you should be uploading to the SWS. See the Cloaking steps in Lecture Notes -- Site Definition.
- Export the .ste file again after you made the correction in Step 3 above.
- Create a Web page (.html) file that contains the title and heading 1 of "My First Web Page" (no quotes). Save this page as cal01.html in the cal1 folder.
- Upload cal01.html to the SWS. Notice that it automatically creates the examples folder on the SWS. This is another advantage of using a Site Definition.
- Add a brief paragraph to cal01.html. Save the file.
- Upload cal01.html to the SWS again. Notice that it overwrites the original one, replacing it. If you refresh the browser that you were viewing it in, it should show the update.
- Check it in a browser to make sure it is on the SWS in the correct location and it appears in a browser correctly.
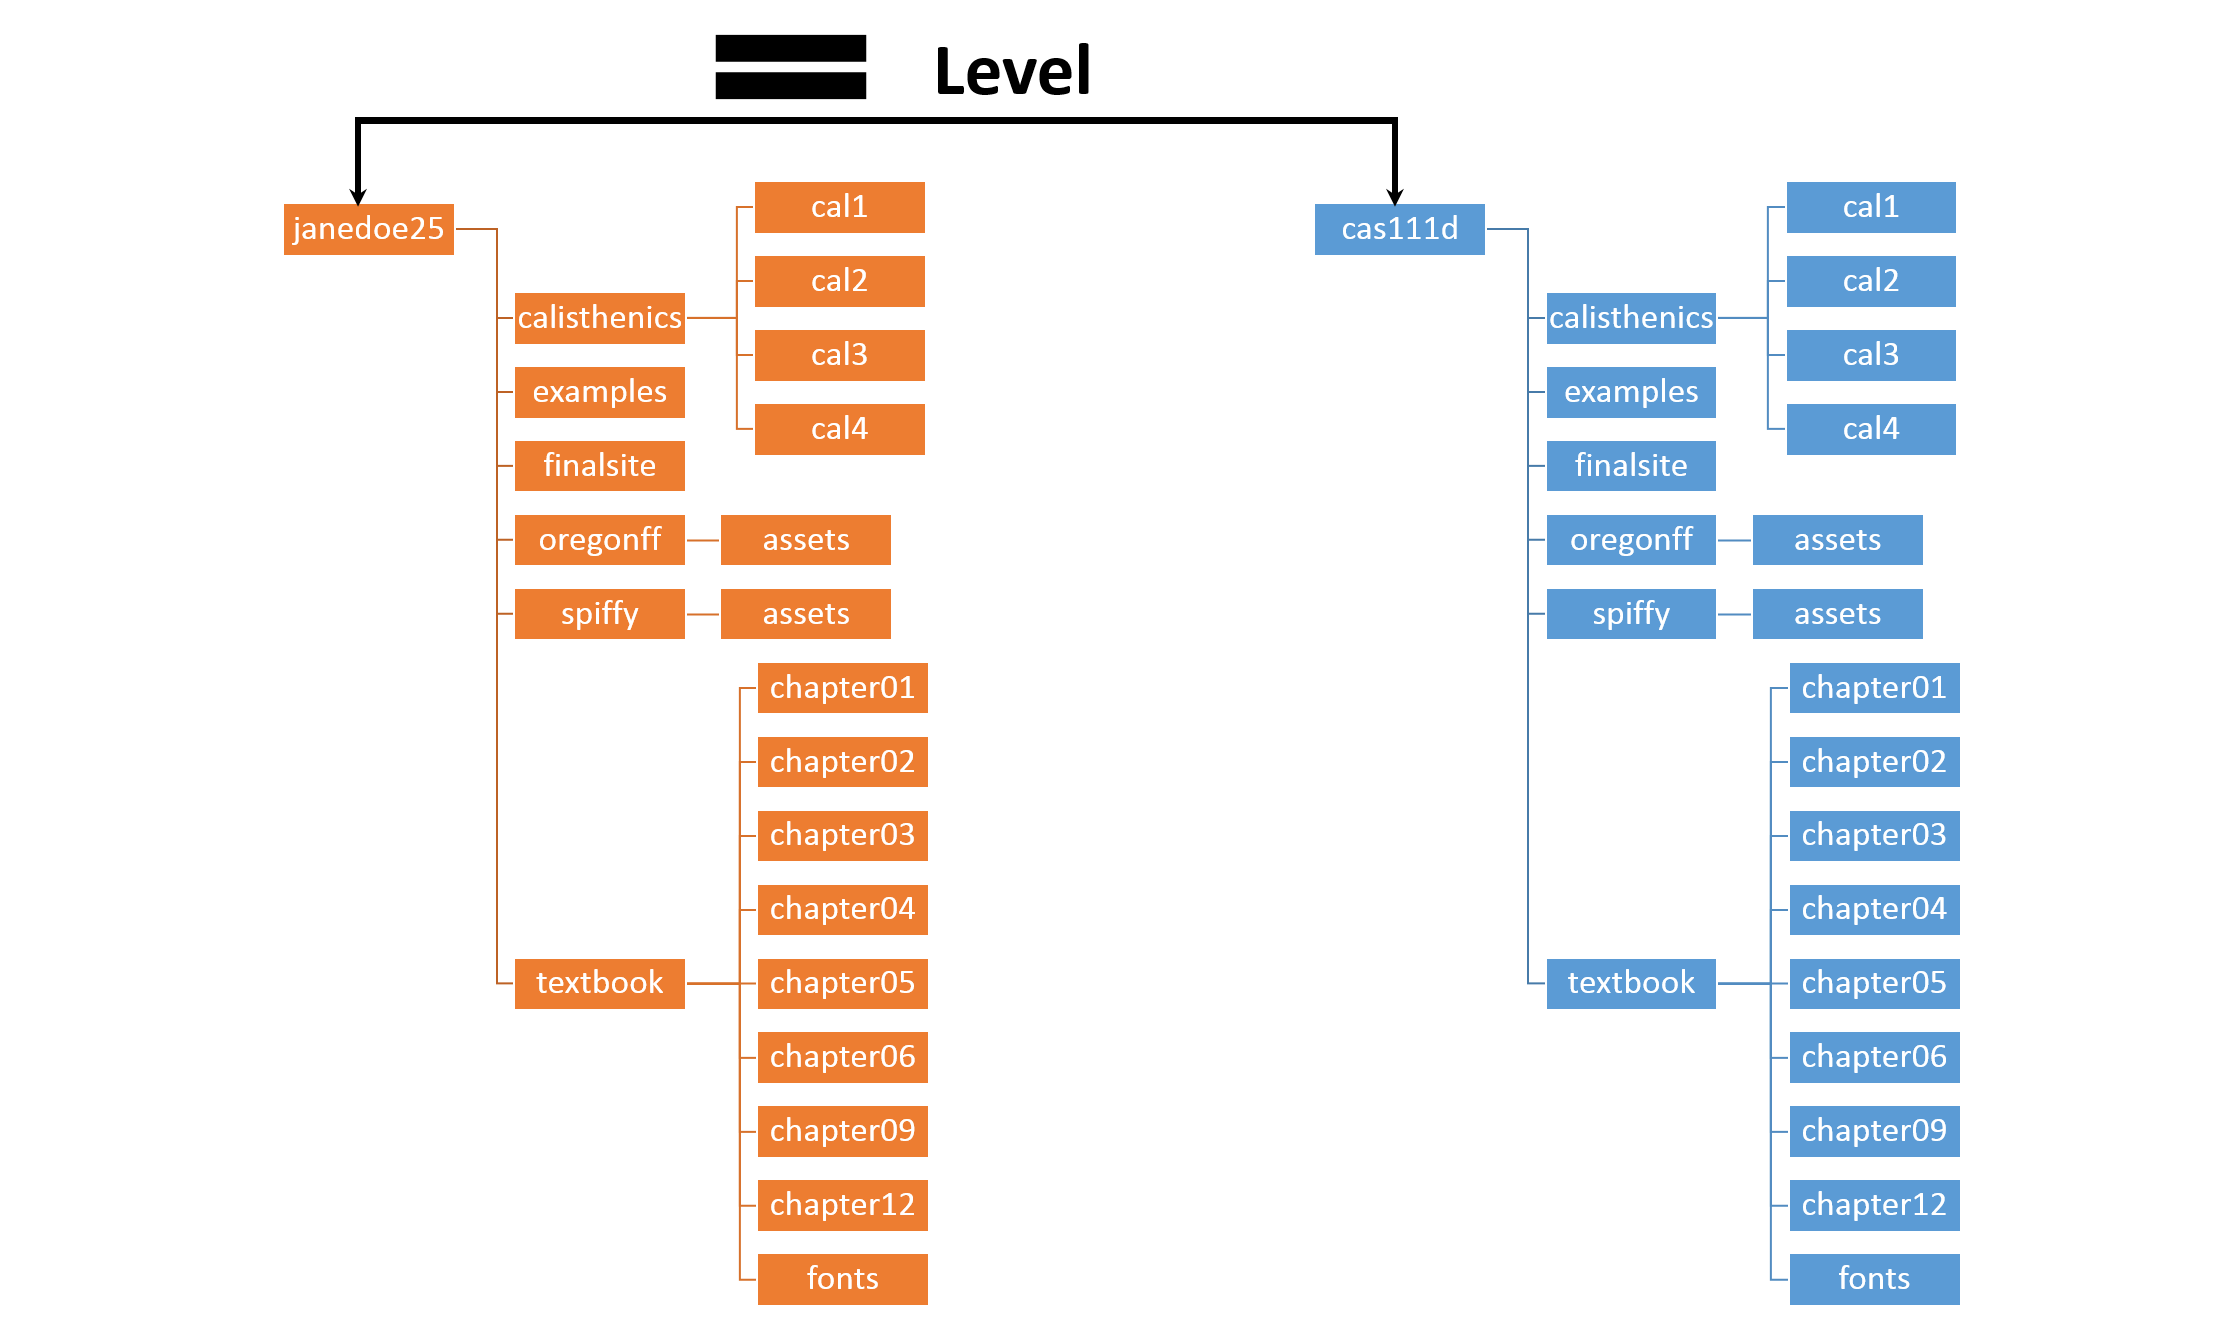
Files that have been uploaded to a server are referred to as remote files.
If you compare your SWS and local folder, the file structure should look like the diagram below:
Part 5 -- Uploading
- Save and upload the cal01.html Web page to the SWS.
- View the Web page through a browser on the SWS.
- Mail it to your instructor using a subject like CAS 111d Calisthenics 1 Uploaded Your Name (where Your Name is your actual name)
Instructor Note:
As you should be in the habit of doing, be sure to use a browser (or more than one browser) to check your Web pages on the SWS to ensure everything works properly.