To Open an Existing Presentation
-
Double click on the PowerPoint icon using the left button
of the mouse
-
Select a the drive and directory where you previously saved
your presentation
-
Click on the filename "buscom1.ppt", Open
-
You will see something like:

|
-
The paragraph sizing can be changed by using the increase/decrease
paragraph buttons.
-
To increase the spacing between paragraphs, press the increase
paragraph button

-
To decrease the spacing between paragraphs, press the decrease
paragraph button

-
Bullet points may be switched on or off using the bullet
point button

-
To enter blank lines between bullet points, or to start a
new paragraph, without an additional bullet point being inserted, press
Shift+Enter.
|
To view all your slides
Click on the icon at the bottom
of the screen. This will show your slides all on one screen, something
like below: icon at the bottom
of the screen. This will show your slides all on one screen, something
like below:
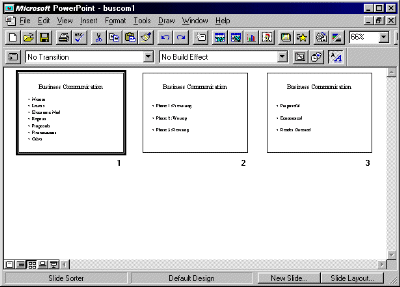
-
The slide outlined in bold shows the currently selected slide
-
Now click on slide 2 and drag it to change place with slide
3
-
Remember, if you make a mistake you can use the undo button
|
| To Insert a Picture
Double click on the screen you want to add Clip art to.
From the toolbar, select the Clip-art icon 
-
Choose a picture from the list. Select OK.
-
Click and drag the picture to where you want it.
-
Alter the size if necessary
Click on the icon at the bottom
of your screen so you can see all your slides. You should see something
like below:
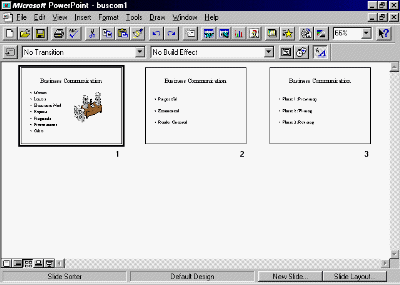
Repeat this process to add clipart to your other slides
if desired. Then, save your work before finishing. |