Web Design for the Impatient -
5 Easy Steps to a Web Page Using Word
Your neighbor has one. Your co-worker has one. Your kid has one. You don't.It's not that you don't want your own web page. You just don't have timeto learn HTML or how to use that fancy (and maybe expensive) WYSIWYG WebEditor. Right?Relax. If you have MS Word (97 or newer), you can make your own webpage in 5 easy steps. Just follow the directions below. And to make iteven easier, I'll toss in some pictures.
Step One - Get Some Content
To start with, you have to have something to start with. Open MS Word andstart writing. Go ahead and make it look like you want it on the web. Throwin a picture or two, (but make sure it's a .jpg or .gif file.) OK, you'vegot a Word document, something like this: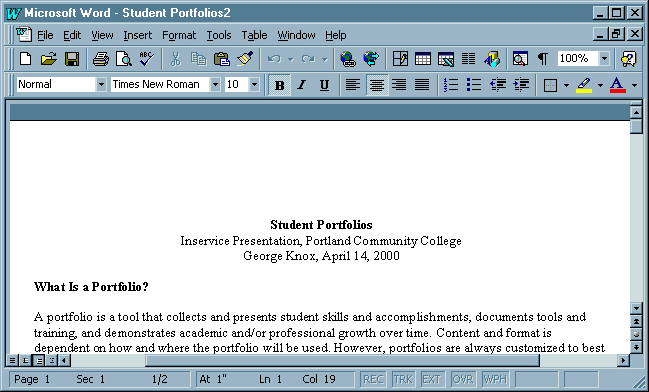
Step Two - Save It for the Web
Now, since you can't open a Word document in a Web Browser, let's saveit as HTML. Click "File", then "Save As HTML" or "Save as Web Page", asshown below. You'll want to give it a short name, since you (and everyoneelse) will have to type out the URL. Then click "OK".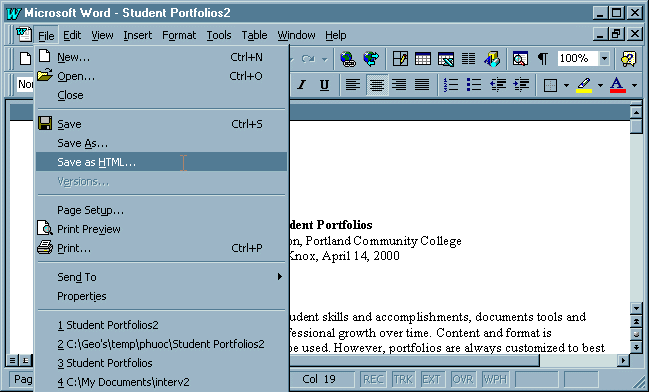
Step Three - Check Out Your Web Page
Congratulations! You have a web page. But you're not done yet. Check yourweb page, and you'll see that Word has changed it (hopefully) a little.You'll need to edit the text, graphics and layout using the Word tools.Note:Your web document will never look exactly like your Word document. I saidit was easy; I didn't say it was perfect.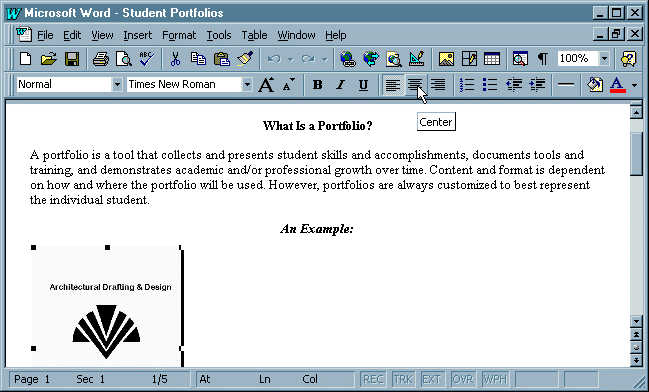
Step Four - Make It Interactive
Hey, you want people to do more than just look at your page, right? Youwant ....... links! You can hyperlink to other pages or help folks e-mailyou. To do this, highlight some text (or a picture). Click on "Insert",then "Hyperlink", as shown below. A dialogue box will open. Under "Linkto File or URL", type in the web address or e-mail you want the readerto jump to. Remember that the correct format for web pages begins: "http://...", while an e-mail begins: "mailto:...". Click "OK" and you've madea link!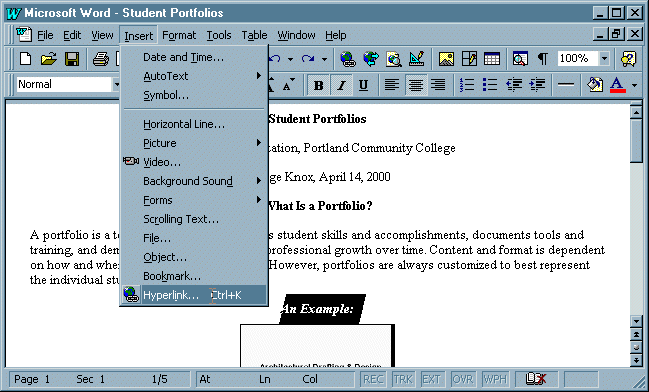
Step Five - Save It Again!
Make sure you save your HTML file. You can always come back and makes somechanges (like adding a spinning, flaming logo.)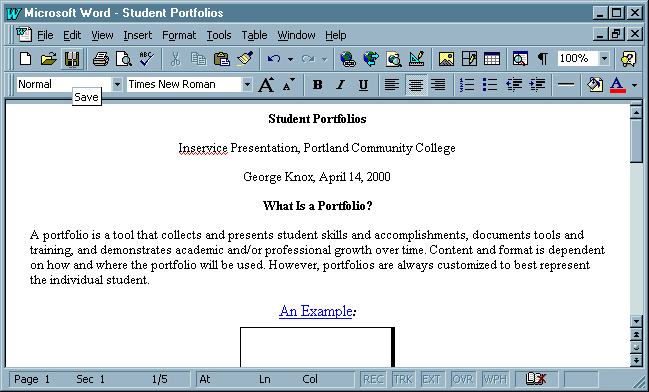
Step Six - Hey, Wait a Minute! You Said Five!
Sure, you can create a web page in five steps. But there's one more thingto do if you want anyone to see it. You need to upload to the internet.To do this, contact your Internet Service Provider. If you already haveweb access, you probably already have web space for your new page. If youdon't have web access, you can use a free web host, although you'll haveto put up with annoying ads cluttering up your work of art. For atutorial on how to upload your files, clickhere.NOTE: When using Word (or any other Microsoft tool) to create a webpage, the application will create a default file name and path for yourgraphics (usually it's something like "/images/image001.jpg"). Whenyou upload the web page, you MUST also upload the graphics using the samefile name and path. Otherwise, the graphic will not show up on yourweb page.
You're a Web Head!


