To Load the Program from Program
Manager
-
Double click on the PowerPoint icon using the left button
of the mouse
-
The "Tip of the Day" may be shown, select OK
-
Select a Blank presentation, select OK
-
Select a Bulleted List (second layout) for your new slide,
select OK
-
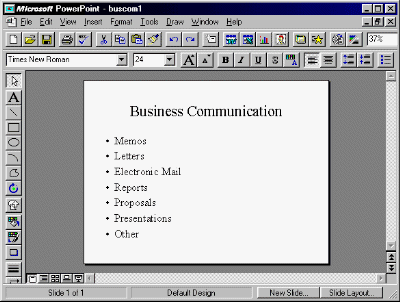
You will see:

-
Click on any one of the MENU items. You should see a window
showing what you can do under that menu. Click anywhere back on your document
to close this window
-
Place the pointer on one of the toolbar icons and wait for
a few seconds. The icon's function will be revealed. A fuller description
of the icon's function can be seen on the status bar at the bottom of the
screen
|
To Enter Text
To enter the heading for your slide:
-
Click anywhere in the box labelled "Click to add title"
-
Type in the heading 'Business Communication'
You do not need to press Enter. If you do you will get
an additional blank line in your heading
To enter the text body for your slide:
-
Click anywhere in the box labelled "Click to add text"
-
Type in your main points, as shown below. Press Enter after
each point.
You do not need to press Enter after entering your last
point

PowerPoint will automatically justify all your entries
Now create 2 more slides, as follows:
-
From the bottom of the screen, click on "new slide".
-
Choose the same layout as before
-
Enter the points for your second screen
-
Repeat this operation so that you have 3 screens in all
|
To Save Your Work to a Floppy Disk
-
From the Standard Toolbar select the SAVE icon

-
In the filename box: Type A and a colon in front of your
filename,
then press Enter, e.g. A:buscom1
(Filenames should be 8 characters or less with
no spaces)
To Save the File to Your Area on
the Network
-
Repeat the above but omit the A:, e.g. type buscom1
POWERPOINT will automatically label your file as a PowerPoint
file by adding the suffix .PPT to your filename |


